Introduction
Welcome to the Vision Camera app! Truepic Vision is a digital inspection platform that provides a quick and convenient way to send verified, trustworthy images and videos directly to the requester. The Truepic Vision app is a camera application available exclusively on iOS and Android devices.
If you were instructed to use the Truepic Vision app by one of our clients, please wait until you have received either an email or text message (or both) with a link that will take you directly to your inspection request for submission.
As tempting as it may be to immediately download the Truepic Vision app, please do not do so without a smartlink. Please wait until you receive a smartlink either via text message or email. Your inspection is "invite-only," which means that you cannot access your specific inspection unless you have the smartlink to direct you there. If you download the Truepic Vision app on its own, it will not work for you.
You received your smartlink, now what?
To begin, you'll need to have your smartphone or tablet running iOS or Android handy so you can tap on the link in the text message or email you received. There is no username or password required to log in. If you received the link through email on a desktop, you can forward it to, or open it on, your smart device.
1. Open the text message or email with the link on your smartphone. Tap on the link.
2. If you're on an Apple device, you will be taken to a new screen. If asked, please click "Allow Paste", then click Download Now.

3. Clicking Download Now will take you to the App Store or Play Store. Download the Truepic Vision app now.

3. Once downloaded, the Truepic Vision App will launch. Your request should open for you, including your name. If it does not, you may see this screen, where you can paste the link from the email or text you received:

4. Once the app recognizes you, it should display your name and what company asked you to use Truepic Vision. Accept the Terms of Service and Privacy Policy by clicking the check box, then click Get Started.

5. A short tutorial screen will show. Press Next at the bottom.
6. The Truepic Vision app requires Camera and Location (including Precise Location) permissions. The Permissions page will show. Press Allow Access on each box, and Allow those permissions.


7. Once all permissions are given, a green "Allowed" sign will show below them, and you will be able to press Begin at the bottom right.

Using the App
The app will show the list of questions from the partner company who asked you to use Truepic Vision:

Answer Questions
Click on the questions to answer them. If it is a photo question, you should be able to start taking photos for that question.

Edit Photos
Change Photo Category  To change the category or question a photo is in, tap the drop-down at the top, and then tap the correct category/question. | Add Note To add a note or description, tap the + Add Note button and type in the text box. | Edit Note  |
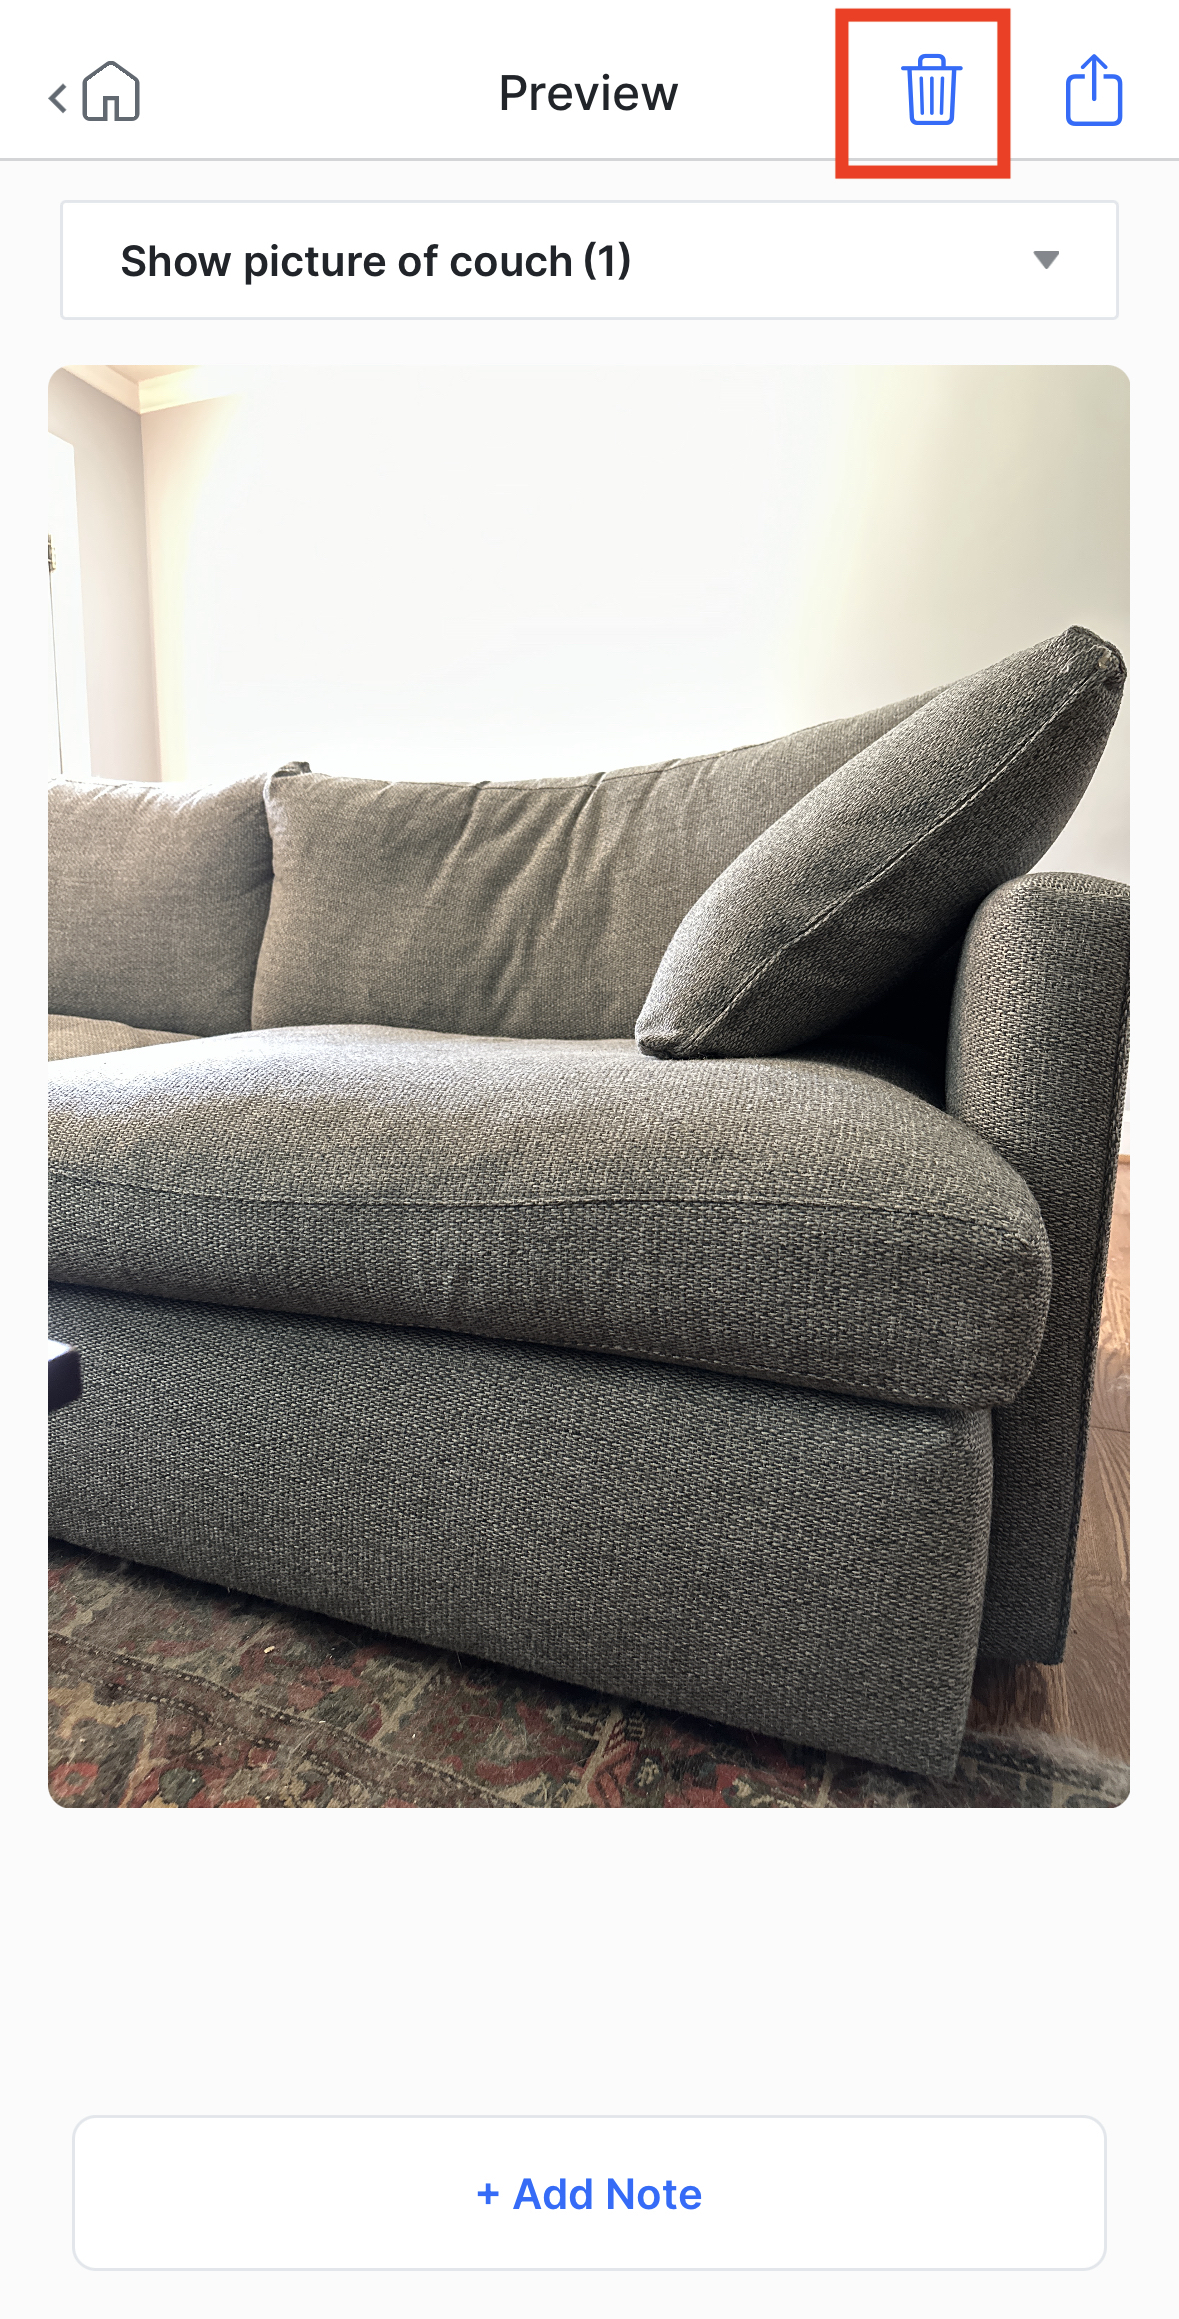
Delete Photos
To delete a photo, select the image you want to delete from the List page, and then select the trash icon in the upper-right-hand corner.
What's Next?
- For an in-depth look into the Truepic Vision app, check out our Taking Photos article.
- Encountering an issue while trying to access your inspection request? See our Need Assistance? article, or contact Support directly.
Was this article helpful?
That’s Great!
Thank you for your feedback
Sorry! We couldn't be helpful
Thank you for your feedback
Feedback sent
We appreciate your effort and will try to fix the article